How to Put In and Remove Flat Back Earrings

This post may contain affiliate links. Read our affiliate policy
To put in flat back earrings, pull or unscrew the decorative front off the post, push the bare post up through the piercing from behind your ear, pinch the flat disc between finger and thumb so it cannot retreat, then press or screw the front on. Back to front, not front to back.
That reversal is the entire learning curve, and it is why a two-second task feels impossible the first three attempts. What follows is the full walkthrough at a mirror: threadless posts, push pin fronts, internally threaded ends, the grip that stops the disc spinning on removal, and what to do when a front refuses to seat. For sizing and materials across the category, start with our guide to flat back earrings.
What You Are Holding, and Which Part Moves
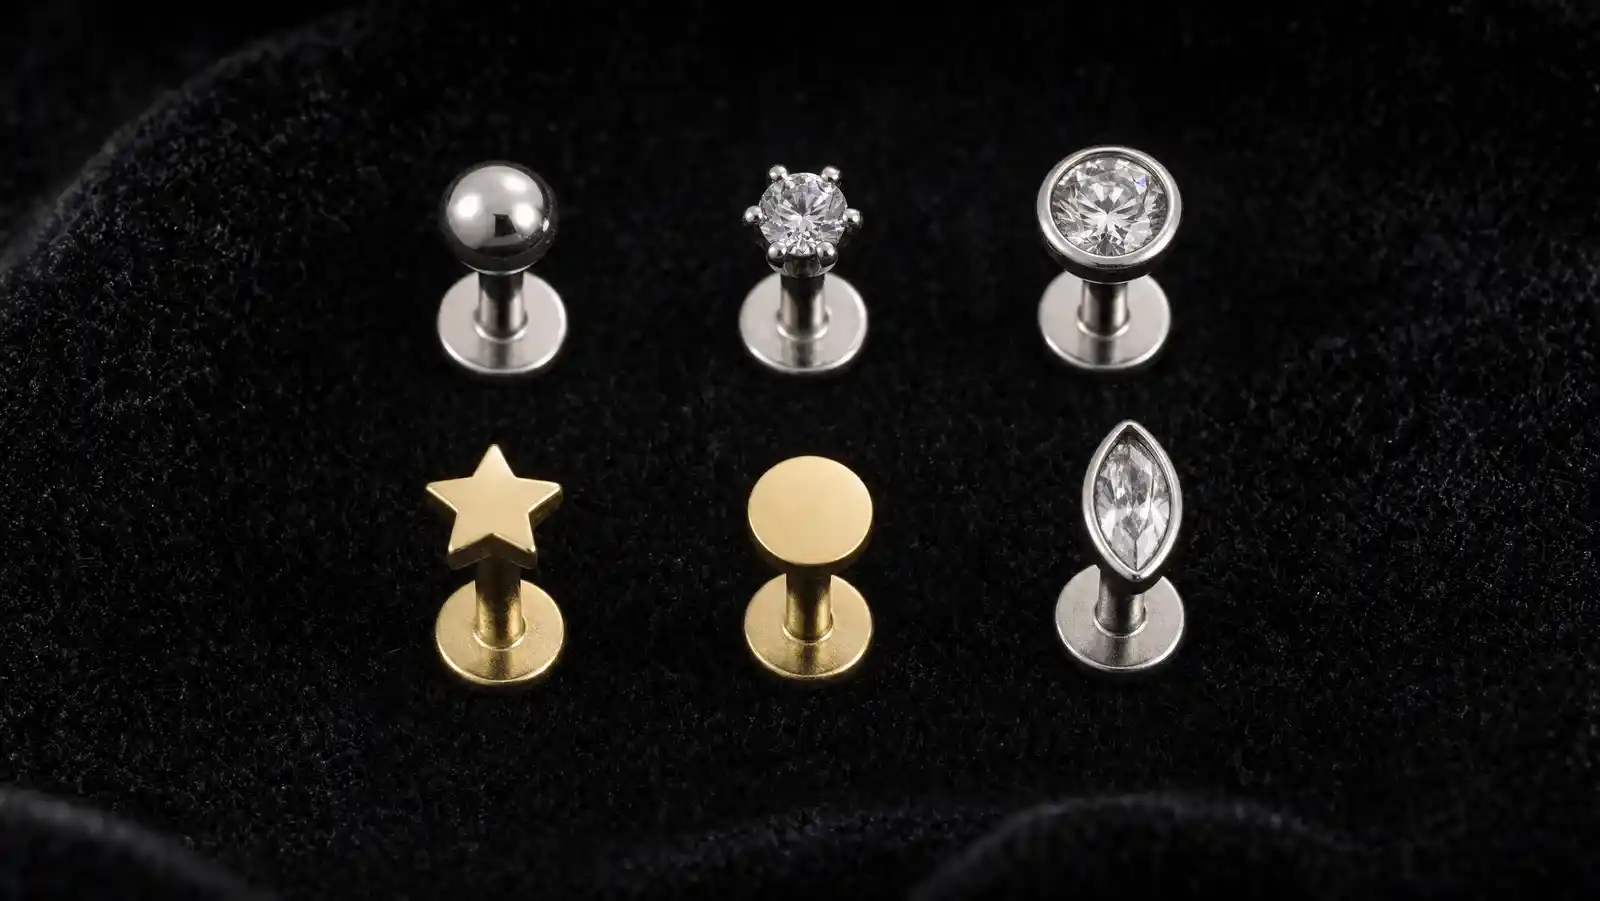
A flat back earring is three parts, and only one of them travels through your ear.
- The post. A straight bar, properly called a labret post, with a flat disc formed or welded permanently onto one end. It does not come off, and pulling harder will not change that.
- The disc. The plate that ends up behind your lobe. Listings commonly show 2.5 mm, 3 mm, 4 mm and 5 mm diameters, with 3 mm and 4 mm the usual lobe sizes.
- The decorative end. The part you see. It detaches from the front of the post, and it is the only piece you handle during a change.
Post thickness is its gauge, and gauge runs backwards: a higher number is a thinner post. Body jewelry size charts published by retailers such as BodyCandy give the standard conversions as 20G equals 0.8 mm (0.81 mm as that chart lists it), 18G equals 1.0 mm, 16G equals 1.2 mm and 14G equals 1.6 mm. Standard lobes are usually 20G or 18G, while 16G is the size most often used for cartilage and labret placements. If you are unsure which you own, our guide to earring gauge and post length has the full chart.
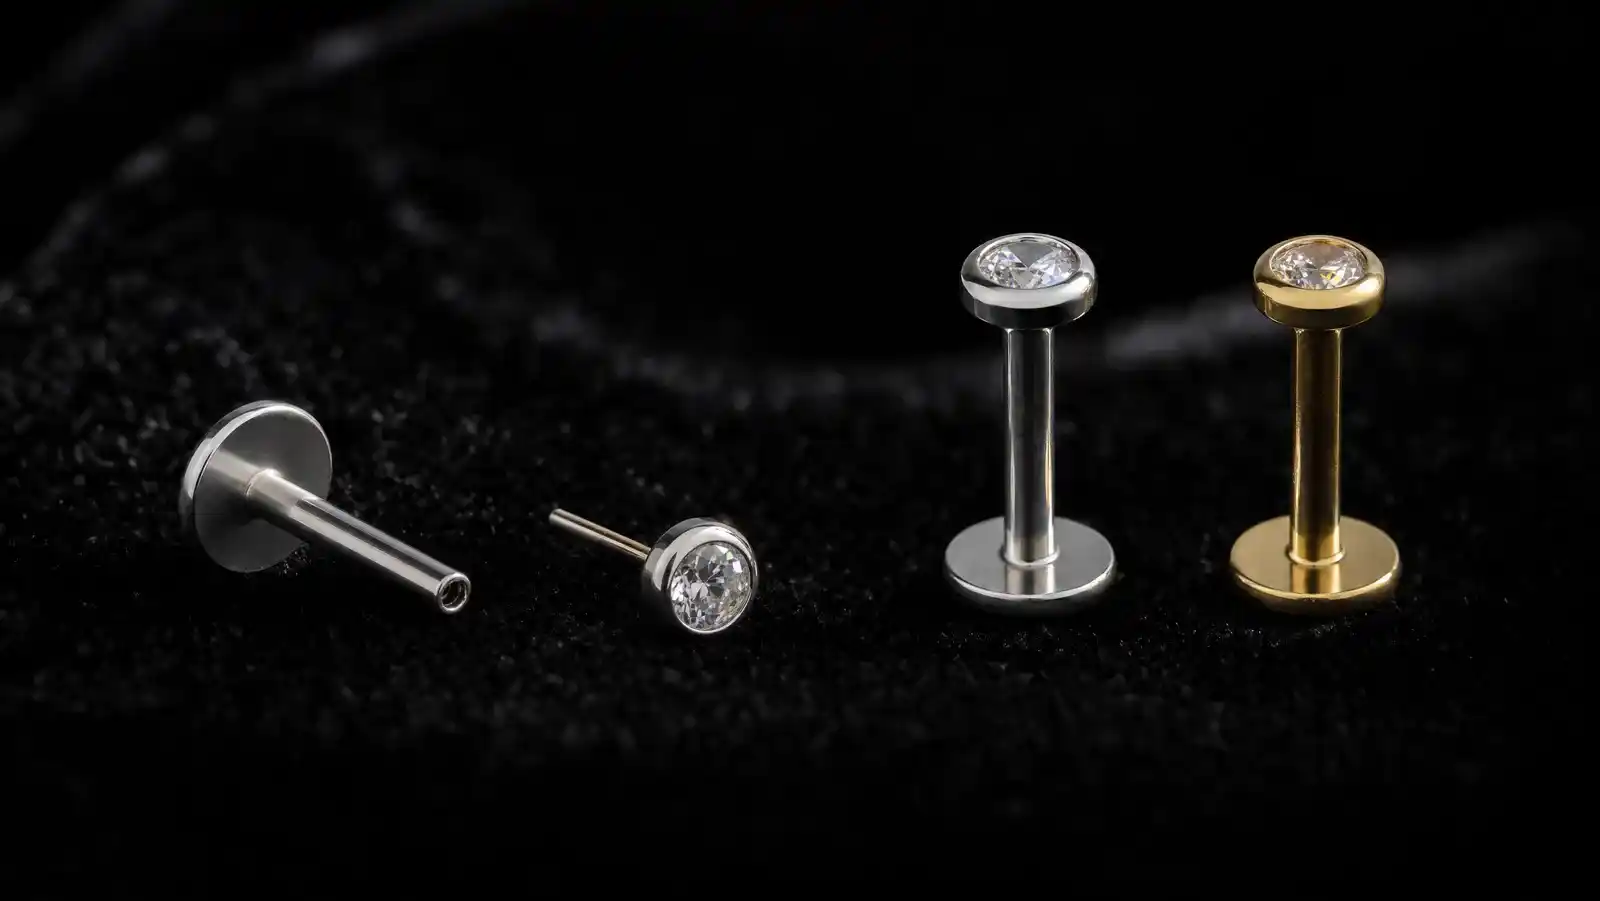
The front attaches one of two ways, and knowing which you have before you start removes most of the frustration. A threadless post is a hollow tube, and the end carries a solid pin held by its own spring tension. An internally threaded post is tapped on the inside, and the end screws in. The two are not interchangeable, which our comparison of threadless and threaded posts covers in detail.
Both exist in that form for a documented reason. The Association of Professional Piercers jewelry standards for initial piercings require that all threaded or press-fit jewelry have internal tapping, with no threads on the exterior of posts and barbells, and that metals carry a consistent mirror finish on surfaces that frequently contact tissue. A smooth post is a requirement, not a nicety.
How to Put In Flat Back Earrings, Step by Step
Do this in front of a mirror the first several times rather than by feel. Flat backs give far less tactile feedback than a sprung clutch, and the failure mode is silent.
- Wash your hands. The CDC handwashing steps are wet, lather, scrub for at least 20 seconds, rinse and dry. The Association of Professional Piercers aftercare guidance is blunter: wash your hands thoroughly prior to cleaning or touching your piercing for any reason.
- Work over something that catches. A folded towel, a closed drawer, or a sink with the plug in. Decorative ends are often 3 mm across, and a drain does not give them back.
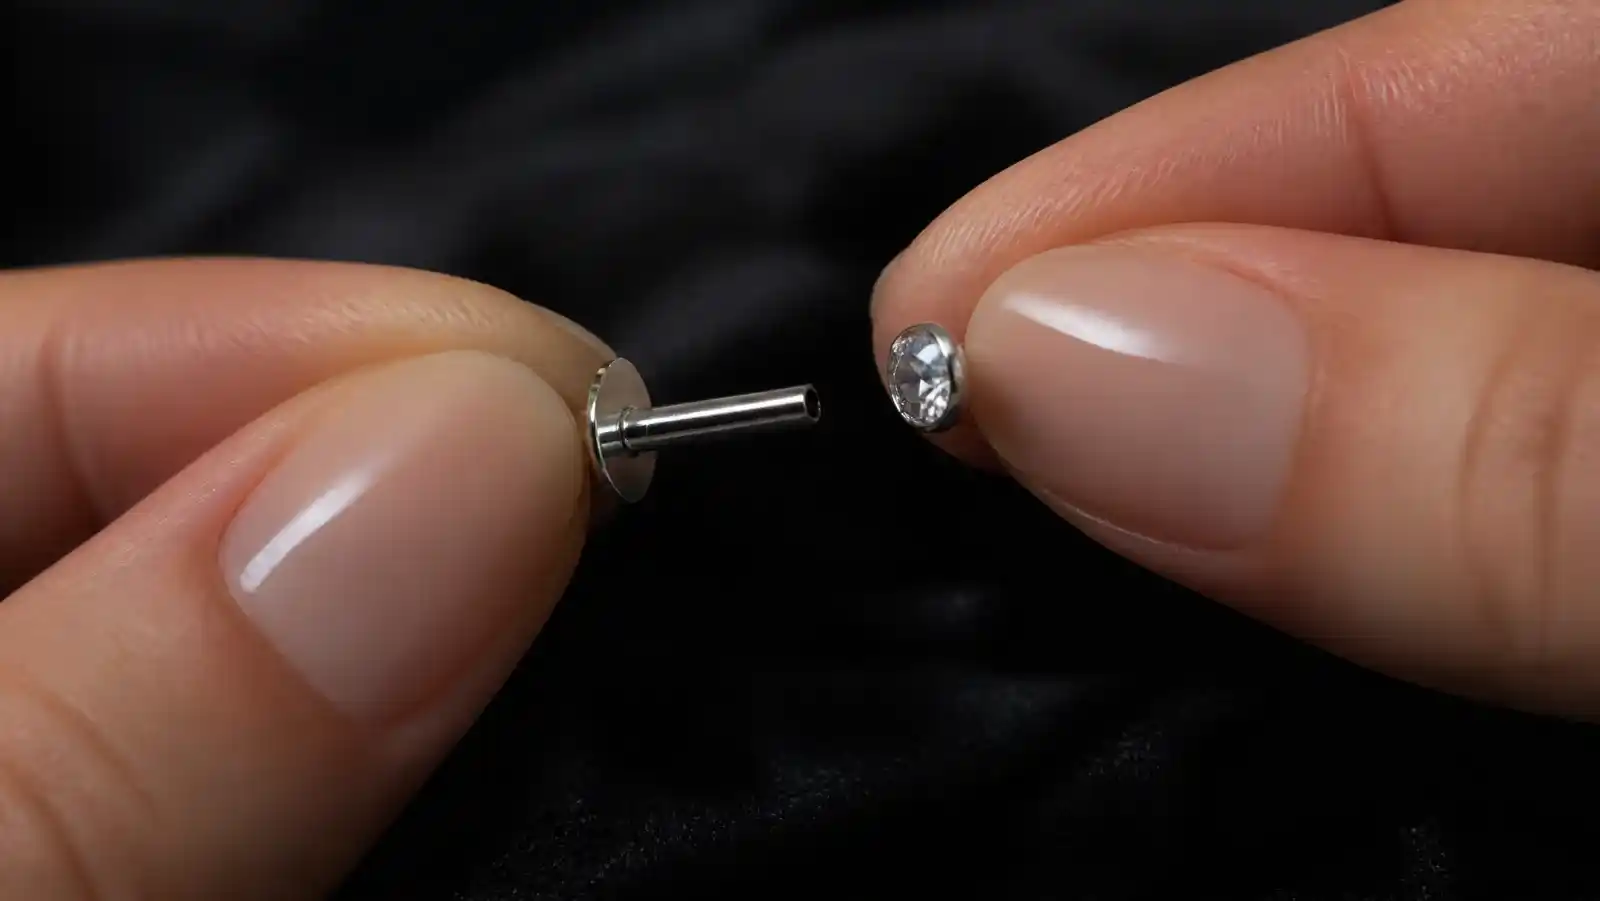
- Separate the front from the post. A threadless end pulls straight out, with a slight twist if it is snug. A threaded end unscrews counterclockwise. Put the front down rather than keeping it in your working hand.
- Find the hole from behind. Tilt your head toward the mirror until you can see the back edge of the lobe, hold the post halfway along, and bring the tip to the skin perpendicular to the lobe, not along it. Channels rarely run at the angle the front suggests.
- Push until the post shows at the front. The disc follows the post through and comes to rest flat against the back of the lobe. Two or three millimeters of bare post showing at the front is enough to work with.
- Pinch the disc and keep pinching. Grip the disc edge-on between index finger and thumb of the other hand, pressing it flat to your lobe. This is the step people skip, and it is why the post retreats the instant they push on the front.
- Seat the front straight on. Line the pin or thread up with the mouth of the post and press or screw it on along the post's axis. A pin pushed in at an angle scrapes the rim and bends further than you want it to.
- Tug test both ends. A light pull on the front, then on the disc. Neither should move. If the front shifts at all, it is not seated.
Seating a Push Pin Front, and How Much Bend Is Right
Threadless fronts, sold as push pin earrings, hold by tension rather than threads. The pin behind the decorative end is bent very slightly, so when it is pressed into a straight hollow post it springs back against the inner wall and grips.
The bend is the one variable you control, and the manufacturer that popularized the system publishes a number. NeoMetal's pin bending guide says to insert the pin about one third of the way into the shaft, then bend the pin between 10 and 20 degrees, bending slightly further for a tighter fit, then push the pin fully into the shaft to attach. Its warning matters as much as the instruction: avoid over bending.
Ten to twenty degrees is less than it sounds. On a pin a few millimeters long the bend is barely visible, and the test is feel rather than sight: slight resistance going in, with no struggle.
- Bend the pin away from your ear, never while the post is in your lobe.
- Re-bend rather than replace. Pierced Owl's troubleshooting guide describes a loose end as a pin that is not bent enough, fixed by holding the pin near the base of the pliers and applying a slight bend, then testing by inserting and gently pulling. If the bend ends up too tight, it advises unbending slightly and retesting.
- Push fully home. A pin seated halfway feels attached and comes off in a sweater.
How to Insert an Internally Threaded Post
Internally threaded ends are slower to change and harder to lose, which is why they are the usual choice for anything with weight to it.
Hold the disc as above, set the end against the mouth of the post, and turn clockwise. Hand-firm is the target and nothing beyond it: these threads are very fine and the parts are a few millimeters across, so extra torque buys no security and risks stripping a thread you cannot replace.
Cross-threading is the common failure. If the end does not catch cleanly within the first half turn, or turns with a gritty feel, back it out completely rather than forcing it. The sign you are doing it right is that the disc stays still; if it rotates with the end, you are turning the whole earring in your ear rather than tightening the join. The APP standard also rules out the third variant still widely sold, externally threaded posts, where the thread is cut on the outside of the shaft and passes through the piercing channel at every change.
Healed Ears, Healing Piercings, and Who Should Be Doing This
Everything above assumes a long-healed lobe. For a new piercing, the honest answer to how to change flat back earrings is that you do not.
The APP aftercare guidance is explicit: unless there is a problem with the size, style or material of the initial jewelry, leave it in place for the entire healing process, and see a qualified piercer to perform downsizes or any jewelry changes during healing. It also notes that a piercing may seem healed before the healing process is actually complete, because wounds heal from the outside to the inside.
That explains the post you were pierced with. Studios fit a deliberately longer shaft at the outset to allow for swelling, then swap it for a shorter one once the swelling settles, a step piercers call downsizing. The timing is a judgment about your ear, and it belongs to the person who made the piercing. Anything red, sore, weeping or newly irritated is a conversation with a piercer or a clinician. The same guidance adds one line worth remembering before you leave anything out for long: even well-healed piercings can shrink or close in minutes, and reinsertion can be difficult or impossible.
How to Remove Flat Back Earrings Without the Disc Spinning
Removal is where fronts get lost, almost always because one hand is doing two jobs.
- Behind the ear. Index finger and thumb of your non-dominant hand pinch the disc edge-on, flat against the lobe. You are gripping the plate, not the post.
- In front. Thumb and index finger of your dominant hand take the decorative end itself, as far from the post as the design allows.
- Threadless. Pull the two apart along the axis of the post. NeoMetal's instruction for a tight fit is to add a twisting motion while pulling.
- Threaded. Turn counterclockwise while the back hand holds the disc absolutely still. If your lobe is turning, stop and reset the back grip.
- Then the post. With the front off, slide the post out backwards, the way it went in, and put both pieces down before you admire anything.
Dry your fingers first, because wet skin on polished metal has almost no grip, and use a clean disposable glove or a thin rubber pad on the front hand if the end is small and faceted. If this stays a nightly irritation, keeping simpler studs in rotation is a fair answer, and our comparison of how flat backs compare with butterfly backs weighs the fiddle factor against the comfort gain.
When It Will Not Work: Troubleshooting
| Symptom | Most likely cause | What to do |
|---|---|---|
| Post will not find the hole from behind | Wrong approach angle | Work in a mirror, change the angle in small increments, stop if it hurts |
| Front will not seat on a threadless post | Pin arriving at an angle, or over-bent | Remove, check the pin has one bend and no others, re-approach square to the post |
| Threadless end keeps falling out | Pin under-bent, or pushed only halfway | Add a little bend, test for slight resistance, push fully home |
| Threaded end turns but never tightens | Cross-threaded, or the whole earring is rotating | Back it out completely, hold the disc still, restart the first half turn slowly |
| Flat back earrings stuck, disc feels immovable | Front still partly attached, or tissue swollen around the disc | Confirm the front is fully off, do not force it, see a piercer |
| Post catches on clothing and hair | Shaft length wrong for your lobe | Measure the wearable length and size down deliberately rather than tightening harder |
Two rows deserve more than a line. A front that will not seat is almost never a faulty part: on threadless it is an angle problem, or a pin carrying two bends from an earlier over-correction, visible if you sight along it against a straight edge. On threaded, it is cross-threading.
A back that feels stuck is usually a front still fractionally engaged, so the post cannot move, or a disc pressed into slightly swollen tissue that needs a relaxed lobe rather than more force. If gentle attempts are not working, or the area is sore, a piercer has tools and a view of the back of your ear that you do not.
Hygiene, Before and After
Clean hands before, and clean parts after. The jewelry matters as much as the ear here. A threadless post is a hollow tube and a threaded post is a tapped socket, so both trap residue in a way a solid post does not. Clean the parts while they are apart, dry them fully before reassembly, and store ends where they cannot roll; our cleaning and storage routine covers the specifics by metal.
For the piercing itself, the APP strongly encourages a sterile saline labeled for use as a wound wash, with 0.9 percent sodium chloride as the only ingredient, and warns against additives such as moisturizers and antibacterials, and against similar-sounding products including contact lens saline, nasal spray and eye drops. It also notes that moving or rotating jewelry during cleaning is not necessary and may irritate the piercing, which is worth knowing if you were taught to twist studs daily. If your ears react to the jewelry rather than the technique, the metal is the variable: our notes on reactive ears cover nickel release.
Common Questions
Why can I not find the hole from behind my ear?
Because you are approaching at the angle the front of the lobe suggests, and channels often run at a slant. Locate the entry point by touch with a fingertip, then bring the post to that spot perpendicular to the skin. If the post stops against resistance rather than sliding, change the angle instead of pushing harder.
Why does my disc spin when I try to unscrew the front?
Because the back hand is not holding it. A spinning disc means the whole earring is rotating in your ear, so the join never loosens. Pinch the disc flat to the lobe, then turn the front only.
Is a flat back harder to put in than a regular stud?
Harder for the first week, easier afterwards. The mechanism is simpler than a sprung clutch; it is just loaded from the unfamiliar side, as our wider survey of earring backings and fastenings sets out.
The Bottom Line
Four things carry the whole job. Load from behind. Hold the disc with a hand that is doing nothing else. Push a threadless pin fully home and treat the 10 to 20 degree bend as the adjustment that sets retention. Turn a threaded end only to hand-firm, and back it out completely at the first sign of grit.
Do that over a towel, with clean hands, at a mirror, and the learning curve is measured in days. For gauge, shaft length, disc diameter and the material standards that decide what is worth putting through your ear at all, read this alongside our flat back earrings guide. And for a piercing that is new, sore or not behaving, the next step is a piercer, not another attempt at the mirror.
About the Author
Alfreda Borror
Alfreda Borror is the founding editor of Opulent Opal, writing research-based buying guides on diamonds, birthstones, and fine jewelry.